This post was last updated on July 13th, 2022 at 09:48 am
If woodworking intimidates you, keep in mind these two things: 1) You don’t need a big collection of power tools to work with wood. 2) You don’t need to achieve a certain skill level to be a woodworker. With relatively few tools, you can take on many simple and inexpensive wood projects.
I’ve managed to “get by” with only a handful of power tools: a couple electric sanders, a Dremel, an oscillating tool, a vintage saber saw and a drill. My primary cutting tools are a handsaw and miter box. Admittedly, I sometimes feel envious of the projects requiring tools I don’t have. My solution isn’t to run out and get new tools, however. Rather, I focus on projects that my humble collection will allow.
When picking a project, I consider three criteria: difficulty, expense and impact. If it’s overly complicated, costs a lot or wouldn’t get much use, I scratch the idea. Here are five projects I did over the past year that met my three criteria. All of them require little more than a desire to cut and drill wood. It doesn’t hurt, either, to be willing to experiment with whatever random hardware you can find in your workshop.
01 Knife and kitchen accessory holder
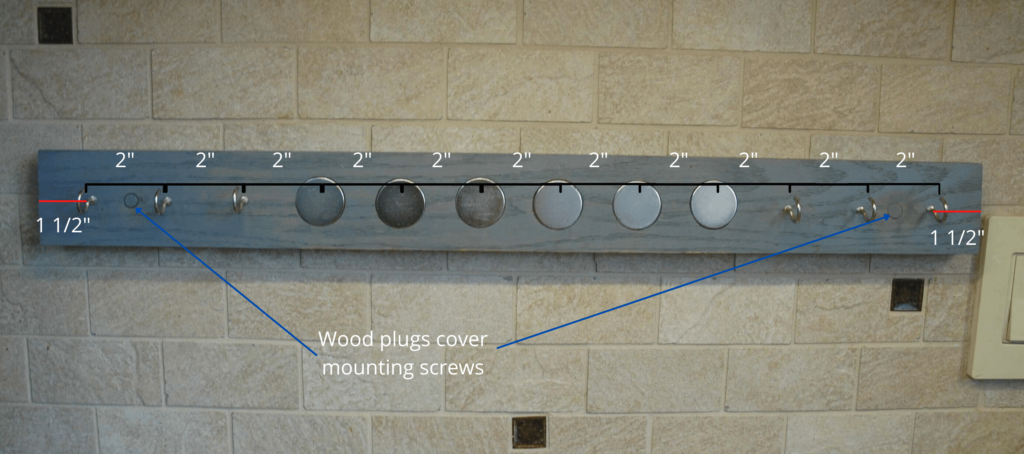
Keeping the kitchen organized and common utensils easily accessible is a never-ending pursuit. I grew tired of shuffling through drawers to find knives, peelers, pizza cutter, can opener, etc. I could have bought a relatively inexpensive knife holder on Etsy or Amazon, but building one allowed me to customize it to meet our storage needs. Not only did I want to get knives out of drawers and onto magnets, I also had other bulkier, nonmagnetic utensils I wanted to put on hooks. I’ve included a list of materials and directions for this project. Keep in mind, you can adjust the board length and add or remove as many hooks and magnets as you feel you need.
Materials
- 1-by-3-inch maple (or other hardwood) board, 25 inches in length
- 6 hooks
- 6 rare-earth disc magnets (1½-inch diameter) (Note: Be careful with these. They’re powerful!)
- Mounting hardware: 2 screws, 2 wall anchors
Directions
- Sand and stain (optional) your board.
- Center and space hooks 2 inches apart (3 hooks on either side of row of 6 magnets). Place the far-left hook and far-right hook 1½ inches from the board edge.
- Use a 1½-inch boring bit to drill holes for placing disc magnets. (I practiced on scrap wood before drilling on my project board). Space holes 2 inches apart (measured from hole center).
- Glue magnets into holes. (Use an epoxy that adheres to metal)
- Mount your holder with two wall anchors. Make sure to use a level. Drill about 1/4-inch-deep hole in holder before driving screws through holder and into the anchors. Then cover the screws with 1/4-inch wood plugs.
02 A rustic headboard
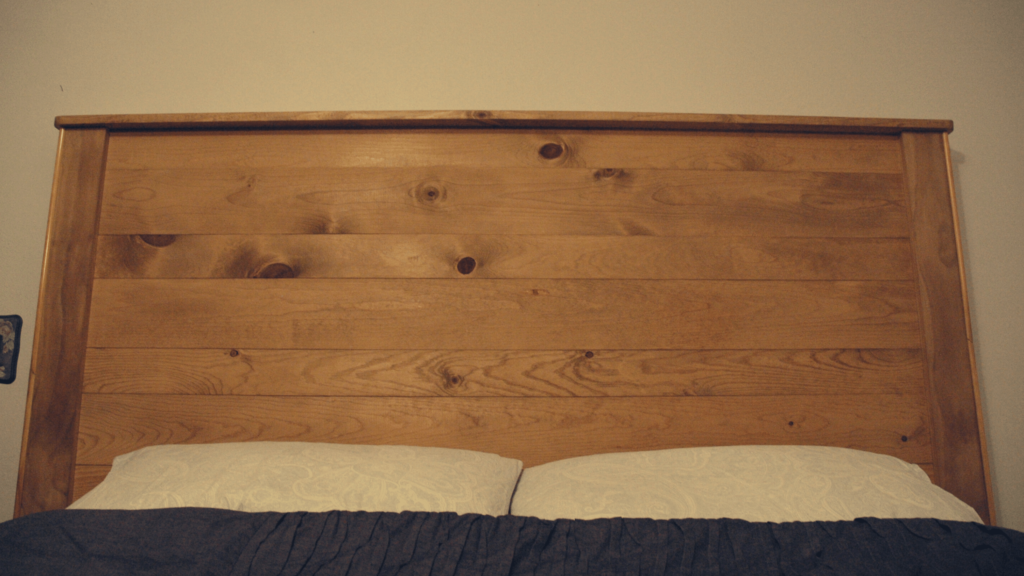
Yes, it’s possible to build a headboard using only a handsaw and miter box (and some glue, nails and screws). And it can be simple and inexpensive. My headboard was inspired by a video created by The Rehab Life (see embedded video below). I waited for a lumber sale at my favorite big box store, Menards, and bought the mid-grade pine. To ensure the pieces would fit together, I took care to select the straightest possible boards. The headboard in the video below is designed to be mounted to a bed frame, though I mounted my headboard to a bedroom wall with French cleats. There are many YouTube videos on how to make French cleats. Spoiler alert: You’ll want a table saw to make the French cleats. It helps to have a friend (thank you, Jared!) who’ll happily make the cut for you.
03 Mask or key chain holder
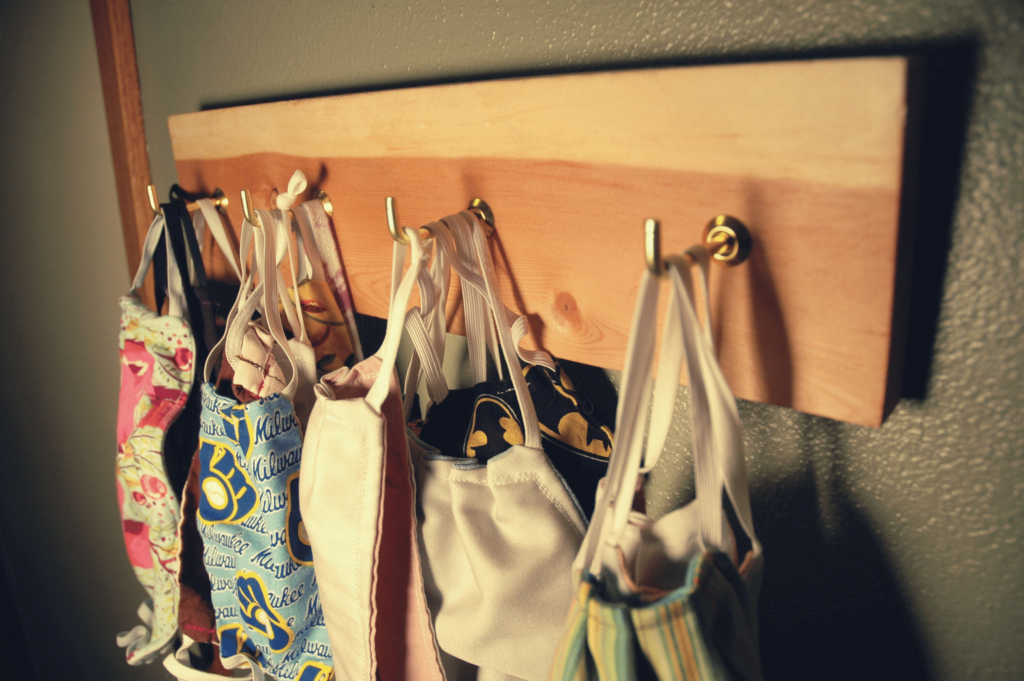
My hope is to convert our mask holder into a holder for key chains (because I’m constantly misplacing mine) once the pandemic ends. We’re lucky to have a sewer in our family. My wife made our family a large collection of masks at the pandemic’s onset, and we keep track of them by hanging them from hooks—one for each person in the family. Prior to making this mask holder, we were storing masks on the knobs of our kitchen cabinets. It wasn’t an ideal setup. I put the mask holder next to the garage door, so the masks are visible on the way out the door. The holder reminds us to grab a mask before leaving home. Here’s what you need to build a holder for a four-person household:
Materials
- 1-by-4-inch pine board, 14 inches in length.
- 4 hooks
- Mounting hardware: 2 sawtooth hangers for mounting, 2 nails
Directions
- Sand and stain (optional) your board.
- Center the hooks and space the hooks 3½ inches apart, with the far-left and far-right hooks spaced 1¾ inches from the board edge.
- Insert hooks.
- Mount to wall with sawtooth hangers. Make sure to use a level.
04 Tomato raised-bed garden, using project scraps
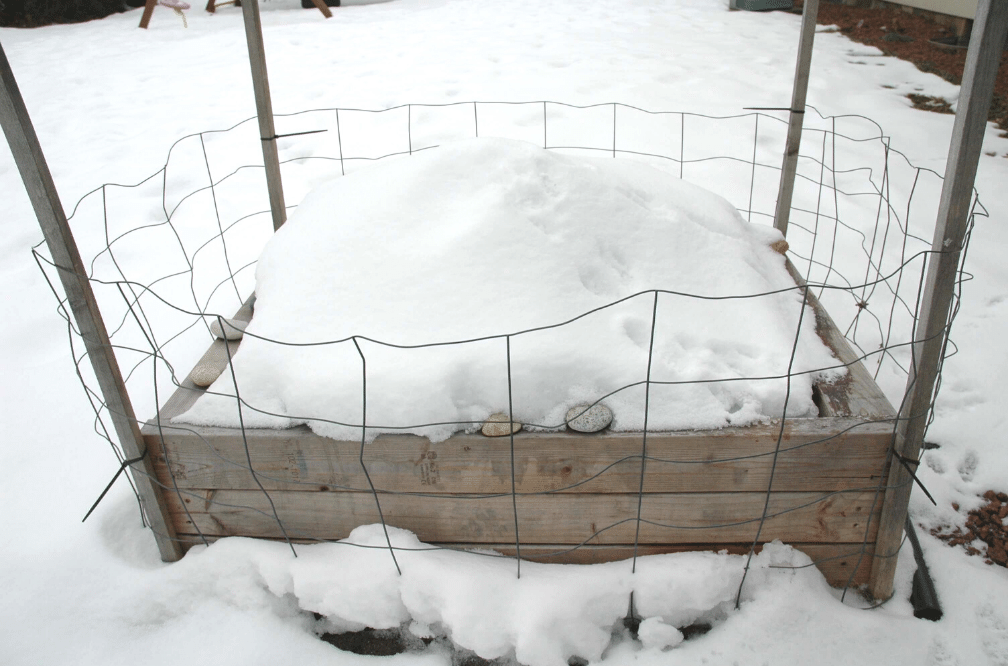
The coronavirus pandemic has had some positive effects, such as inspiring people to garden. We hopped on that trend last year by building a small raised-bed garden (I later built two larger raised-beds to start using in the spring of 2021). This was an opportunity to use some boards in my workshop just waiting to be given a purpose. I found some 4-by-4 poplar lumber leftover from a sandbox project along with some random 1-by-4s and 2-by-4s. I cut the pieces to length and then screwed them together to form a 4-by-3-foot box, about 12 inches deep. We grew spinach and then tomatoes. I added fencing to keep out rabbits, though a fence isn’t needed if you’re only growing tomatoes. It’s not the prettiest setup but worked great!
05 Random pieces of décor
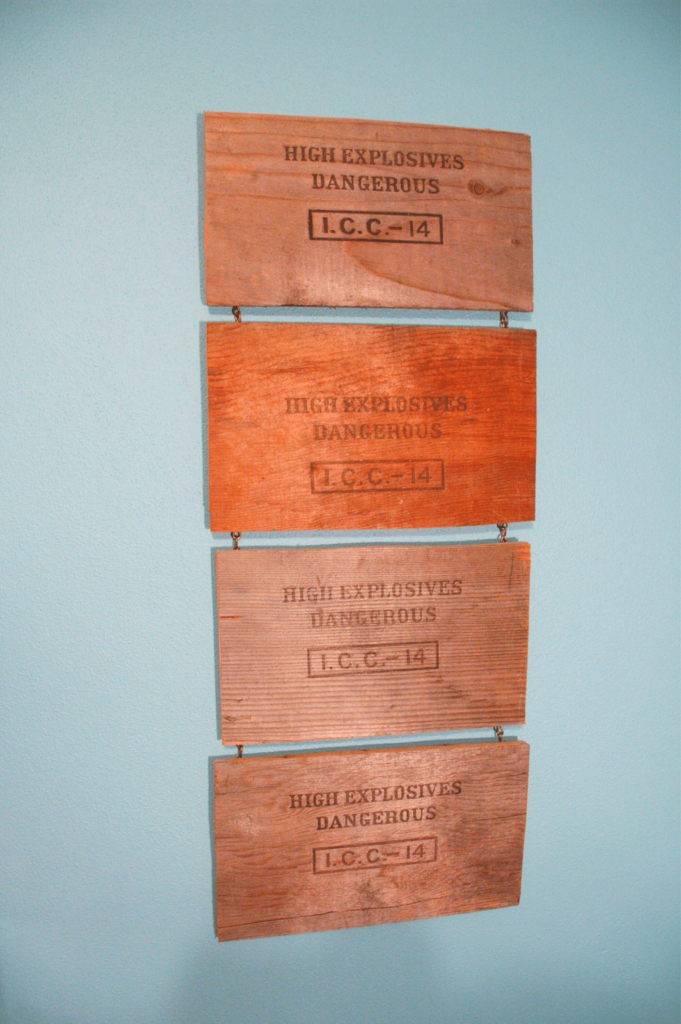
You can buy wood engraved with inspirational sayings, or you can make something yourself. For this project, I used a vintage, weathered wooden box that was falling apart and destined for the garbage. But at the last moment, I decided I couldn’t toss a box with a label on four sides that said: “HIGH EXPLOSIVES DANGEROUS.” What 6-year-old boy wouldn’t like that hanging in his room? I cut up the box and turned it into wall art by attaching each section with chains and hooks. I didn’t buy anything new to make this project, relying entirely on anything I could scavenge from my workshop. The piece now hangs above our son’s bed.
(Some online research revealed the abbreviation ICC stands for Interstate Commerce Commission. I believe the “14” indicates the type or grade of explosive.)
I don’t expect many people to have an old explosives box lying around, but my point is to keep an eye out for “junk” that can be converted into art. Also, keep an eye out for wood scraps and random pieces of hardware to make simple and inexpensive wooden toys. I’ve made several with our son and daughter over the years. It doesn’t matter how “realistic” the toys look. You’ll likely discover your kids get as much satisfaction from making the toys as the toys themselves.
What project do you want to tackle?
I highlighted these five projects because they were all simple and inexpensive—and rewarding. You don’t need to be a carpenter to do them, and the stakes aren’t that high. There’s room to make mistakes (I’m evidence of that). All you need is a basic set of tools and, at least in my case, some guidance from YouTube. It also helps to have a friend who can rescue you in case you get stuck or need a hand. What are some simple, high-impact projects you’ve done recently? Please share in the comment section below.

